4 Best Baseboard LED Channels

4 Best Aluminum Channels For Baseboard Lighting

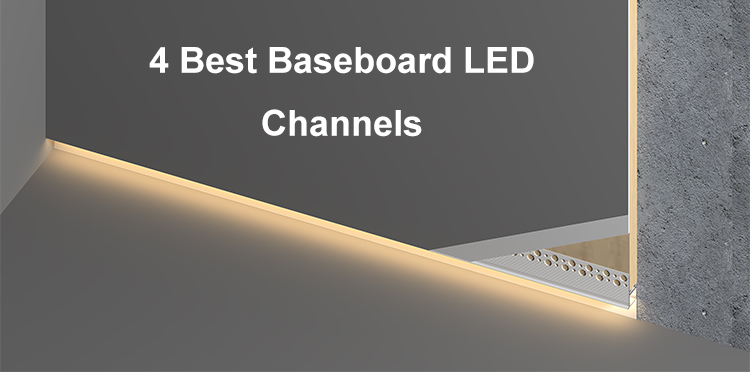
What is Baseboard?

The baseboards are the metal or wooden pieces that allow you to install them along the bottom of the walls. You can use them to enhance the aesthetics of your place but also prevent water to the drywall. The main material is wood, MDF, or PVC. They are in different heights, styles, and colors. Some are plain, while others have decorative designs. Now, more and more customers will choose baseboards that allow the integration of lighting to add lighting to the floor. Not only for safety but also to enhance the ambiance.

Why Need To Add Baseboard Lighting?

The skirting lighting is a simple way to enhance your place, below are the benefits you will get.

Better Ambiance

You can add various static color or dynamic LED strips into the baseboard channels to soft lighting to create a warm, inviting glow at floor.

Improved Safety

Add lighting to the floor will allow you to see at night without turning on the main lighting. They will brighten the dark areas around the baseboard to prevent slip and Collision.

Modern Look

Most of them can integrate into the baseboard seamlessly for a sleek and minimalist finish. It will make your room feel more luxurious.

Space Illusion

The lighting at the baseboard level makes your place look bigger. It draws the eye upward, creating depth.

Energy Efficiency

The skirting base lighting uses less power than traditional wall lights. It will save power and reduce your power cost.

How To Add Them?

To add the skirting board LED channels to your place, you need to consider the facts below:

LED Aluminum Channels

Various styles and colors of LED profile channels are available on the market with different installation methods. Please check and confirm the details before you start your project. There are black, white, and silver color ones available; you can also customize the color from us. Take the ones that can be blended into your space. If there are corners, you also need to consider how to install them for corners.

LED Strip Lights

After you select the LED channels, then you need to confirm the width of the LED strips you can use. Because our baseboard profiles have a downward lighting design and do not need bright lighting for the toe kick lighting, you can add the 2700K&3000K warm white or 4000K natural white LED strips inside, no matter if they are COB or SMDs, do not worry spots.

Power Supply & Controller

Because the LED lights work on low voltage, so you also need power supply. Calculate the power consumption of the LED lights before you purchase LED drivers. The output power of power supplies should have at 10-15% redundancy for long, stable runs. To change the color, adjust the dynamic effects or color temperature, you will need to add dimmers or controllers. You may need the following other products: extended wires, connectors, remote controls, silicone glue, etc. If you are not sure what you will need, tell us how you will lay them out, and we will provide a list of everything you need.

Below are 4 models we recommended.

  1. SK1270 Black Baseboard LED Channels

Those LED light tracks can be seamlessly integrated into the drywall. They have a downward lighting design and have a reflective cove. The lighting will shine indirectly onto floor for a soft and even lighting. They are made of constructured aluminum material with black anodized surface treatment for anti-oxidation. The stock length is 2 meters per piece and easy to cut to any size for your needs. There are 90° and 180° couplers and corner connectors for corner installation. You can use them for baseboard/skirting/Toe Kick lighting.

2. ALP187 White Aluminum LED Profiles

The ALP187 is another plaster-in aluminum LED channels we recommended. They are small in size and lightweight. You can easy mount them on the bottom of walls and bring soft lighting onto the floors. They are made of 6063-T5 aluminum alloy and with white powder-coating for anti-oxidation. The stock length is 78″ and can be cut to any size. The inner width is 10.3mm and allow the max width of LED strips to be 10mm. You can add our 3000k warm white COB LED strips to create a soft and uniform lighting.

3. ALP085 LED Light Channels For Indirect Lighting

Those drywall LED channels have a long profile allows the lighting indirect to the walls, ceilings, or floors. They can be seamlessly integrated into the 5/8″ drywalls for a modern look and deliver uniform lighting. They are made of 6063-T5 extruded aluminum alloy with powder-coating finish for anti-oxidation and extended lifespan. The stock length is 2 meters per piece and can be cut to any size. The Ledbe light channels accommodate LED strips up to 12mm wide; you can add our dotless COB strip lights as the light source for even, spot-free lighting. There are 90°, 90° vertical, and 180° couplers sold separately for straight or angled connections.

4. 5213 Side Bendable Drywall LED Channels

Those drywall LED channels are bendable, which allow them to be bent and along the curved surfaces under staircases, baseboards, rounded walls, arched pathways, etc to add lighting on the bottom part of walls. The silicone diffused covers are included, which will diffuse the lighting evenly without spots. The silicone diffusers are bendable and the max length is 50 meters per roll, which allows to create a long continuous linear lighting along your baseboard.

Final Thoughts:

It’s easy to add to the baseboard or skirting board in your space with our aluminum channels. They not only provide a professional and sleek finish but also brighten dark areas and offer soft, even lighting to enhance both aesthetics and safety.

Now use the code ” NEW ” to order any type of LED profiles on ledbe will get 5% off.

3 Best LED Channels For Staircase

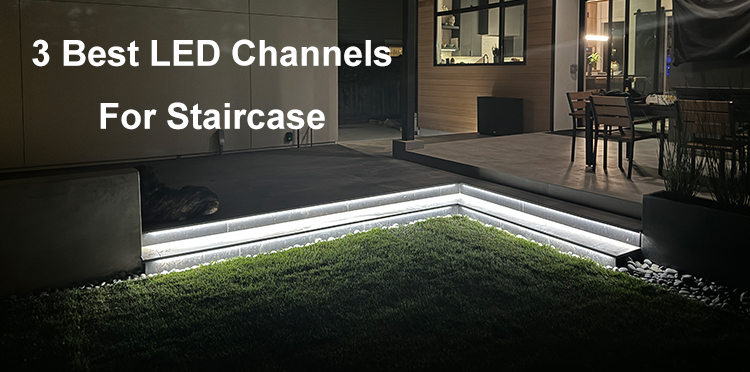
3 Best Aluminum LED Channels For Staircase Lighting

Add lighting to your staircase not only enhances safety but also gives your home a modern and finished look. It’s not easy to light up the whole staircase with traditional lights, considering the staircase is inclined and long. But with our LED light channels for staircase and high-density COB strip lights, it will be easy. We selected the 3 best LED channels for staircase lighting for you below.

  1. ALP192 Handrail LED Light Channels

The ALP192 LED channels have black spray, are heavy and solid, and have up-down lighting designs. They can be mounted on the walls beside the staircase to create warm and even lighting. They are not only LED strip channels, but also can be worked as handrail. They are perfect for home and business to add a modern and stylish look. The stock length is 2M per piece and can be cut to any size for your desire.

There is only one type of diffuser available: PC diffused cover, which are made high-quality material, anti-yellowing, for perfect lighting distribution. The inner width of the light slots is 12.3mm/0.48″, which allow the max width of strip light is 12mm. You can add our high-density COB strip light to create continuous and uniform lighting.

The end caps and screws are included, which allow easy to mount them on the walls. The 180° connectors are sold separately, you can use them to connect the handrail LED channels for straight connection.

2. Black Aluminum LED Channels For Step Lighting

The ALP024-R staircase LED channels can be mounted on the steps to provide downward indirect lighting to stairs, which are designed to provide a professional, glare-free finish. You can install them in cinemas, homes, offices, malls, theatres, etc. They have black spray finish for anti-oxidation and longer lifespan. The stock length is 2meter per piece and can be cut to any size. The inner width of the lighting slot is 13.3mm, and the max width of the tape light is 13mm; you can add our high-density dotless dual white LED strips as the light source to create a uniform and smooth lighting.

There is only one type of diffusers available: PC diffused cover, anti-yellowing, and perfect lighting distribution. It with clip-in design, you can easy to press into the aluminum channels easily. The anti-skid covers are included, and you can insert them into the top slot on the LED channels for anti-slip.

3. Step Nosing / Tile Edge LED Lighting Channels

Those tiled stair nosing aluminum channels have a solid structure and black spray. They can flush mounted into the nosing of the steps, then add LED strips into the light slot to provide uniform lighting to brighten the steps. There are two models available for 8mm and 10mm tiles. The diffusers will diffuse the lighting evenly without visible light dots or dark areas no matte you add SMD or COB strip lights.

The standard length in stock is 2 meters per piece; you can cut to any size you want freely. You can also cut the ends to 45° and spice them together for corner installation. The lighting direction is downward, which provides uniform indirect lighting that to the steps for anti-glare. You can add waterproof LED strips inside and use them in a wet, rainy place indoors and outdoors.

Final Thoughts:

Adding lighting to your staircase is a small project but with a big return. It not only lights the dark areas but also improves safety. Whether you want a practical nightlight or to make your space more modern, they can do it.

How To Cut The LED Profiles To The Desired Size?

The length of most LED profiles in stock is 2M; in some models, it is 2.5M or 3M, and the maximum length can be 6M. We can help you cut to any size you want for free. But when you want to do it by yourself, the question is, how do you do it yourself?

How to cut LED profiles to your desired size

First, we need to know what material the LED profiles on the market are made of to answer the question. Most LED Light Profiles are made of aluminum, but some are made of silicone or PVC. If they are made of silicone or PVC, you can easily cut them to any size with a knife. But for aluminum channels, it’s a little more complex.

Most aluminum LED channels come with aluminum channels and diffusers. Whether you cut by hand or a machine, it’s important to do it correctly to maintain the aesthetics and functionality. So, let’s check carefully how to do it.

how to cut LED channels

Step 1: Before cutting the LED profiles, carefully measure the length you need. You need to measure the length of the LED profiles and the diffusers. Please remember to leave space for end caps and wires. If the aluminum profiles and diffusers are separate, we recommend assembling them before cutting. We will recommend measuring again before cutting them to avoid any mistakes.

Step 2: Choose the correct tools. You can cut them by hand with a hacksaw with a fine-tooth cutting blade or a compound miter saw.

Step 3: Prepare tools before cutting them. Before you cut them, you need to prepare the necessary tools. If cutting by hand, you will need the items below:

  1. Hacksaw with a fine-tooth cutting blade
  2. pen
  3. measuring tape
  4. masking tape
  5. compound square for angled cuts

If cutting by a power machine, you will need the items below:

  1. Compound miter saw
  2. Masking tape
  3. Pen
  4. Measuring tape
  5. Non-ferrous Carbide Blade For Aluminum Profiles
  6. OBS/Plywood Blade For Diffusers
How to cut LED profiles

How to cut by hand?

  1. Stick the masking tape to the place that you want to cut. It will prevent scratches.
  2. Mark the cutting dimension on the tape.
  3. For the large-size LED Channels, we recommend cutting the aluminum channels and diffusers separately.
  4. Cut them slowly and steadily, ensuring your blade remains straight.
  5. Cut to the size you want.

How to cut by a machine?

  1. Assemble the LED profiles and diffusers for cutting. For the large ones, we will recommend cutting the profiles and diffusers separately.
  2. Mark the cutting point on the diffusers.
  3. Use the electronic tools to cut preciously.
  4. Use a miter saw with a non-ferrous carbide blade for precise and clean cuts.
  5. Remember to wear safety gear when operating the power tools.

By following these steps, you should be able to cut LED profiles to your desired size effectively and safely.

Voice Control Home Lighting

How To Control Your Home Lighting By Voice?

Controlling your home lighting by voice is a convenient and efficient way to manage the ambiance of your living space. By integrating smart home devices such as voice-controlled assistants or intelligent light bulbs, and LED Controllers, you can easily adjust the brightness, color, and scheduling of your lights with simple voice commands. This hands-free approach adds a touch of modernity to your home and enhances your living environment’s overall convenience and comfort. So, say goodbye to traditional light switches and embrace the future of home lighting control with voice commands. Today, let’s check how to control your home lighting via voice.

  1. The first thing you must ensure is that you have voice control input devices; the most popular ones integrated with Google Assistant or Amazon Alexa.
Voice Control Input Devices

2. The second thing you must ensure is that the Smart LED Lights can connect to the voice control devices. Except the LED Lights with WiFi communication modules, otherwise you will need to the Gateways, 2.4G Gateways or Zigbee 3.0 Gateways.

3. The third thing is to add them to the various groups on your phone APP to control them separately or in groups.

Today, we will teach you how to do step-by-step operations to control the LED Strips by voice commands.

For the LED Strips, 3 main types of controllers are available that integrate 2.4G, Zigbee 3.0, or WiFi.

For the 2.4G LED Controllers, you will need the items below:

  1. LED Strips
  2. 2.4G RF LED Controller
  3. Power Supply
  4. 2.4G Gateway
  5. RF Remote Control(Not necessary)
  6. Wires

For the Zigbee 3.0 Controller, you will need the ones below:

  1. Strip Lights
  2. Zigbee 3.0 Controller
  3. LED Driver
  4. Zigbee Gateway
  5. Zigbee Remote Control(Not necessary)
  6. Wires
  7. Connectors

For the WiFi Controller, you will need the items below:

  1. LED Tapes
  2. WiFi LED Controller
  3. LED Power Supply
  4. Remote Control(Not necessary)
  5. Wires
  6. Connectors

There are various types of Strip Lights available; you can consider single-color, tunable white, RGB, RGBW, RGB+CCT, Addressable single color, addressable CCT, RGBIC, addressable RGBW, and addressable RGB+CCT. You can use them for various scenes. The IP20 or IP30 non-waterproof strip lights for indoor use only, and you can consider the IP65, IP67, and IP68 ones for outdoor locations.

How to install them in your space?

  1. Hide the Flexible LED Strips: you can use the IP30 non-waterproof and IP65 surface-coated waterproof LED Strips for indoor applications. The back with double-sided adhesive tape. It’s easy to remove the protector paper and stick it where you want to install them. I recommend adding aluminum LED channels to hold strip lights to achieve a clean and professional look while protecting the strips. The LED Profiles also can work as heat sinkers for better heat dissipation.
  2. Connect to the controller: choose the correct LED Controller for the LED Strips. If the controller can not be paired to the network directly, please add Gateway.
  3. Connect the controller to the LED Power Supply. Various output voltage LED Drivers are available. Before you purchase them, please ensure the output voltage is the same as the working voltage of LED Light Strips. For some short applications, you can also consider using a battery pack or power bank to light up.
  4. After the system is powered on, please test if all parts work well.
  5. Test if you can use voice commands to control the LED Lights.

By these following steps, you can easily control your home lighting using voice commands, adding convenience and flexibility to your living space.

How To Hide LED Strips Under Cabinet In Kitchen

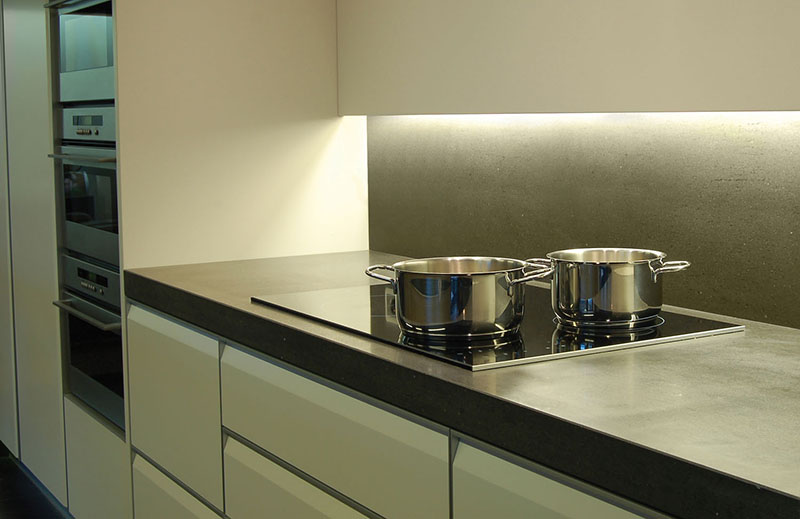
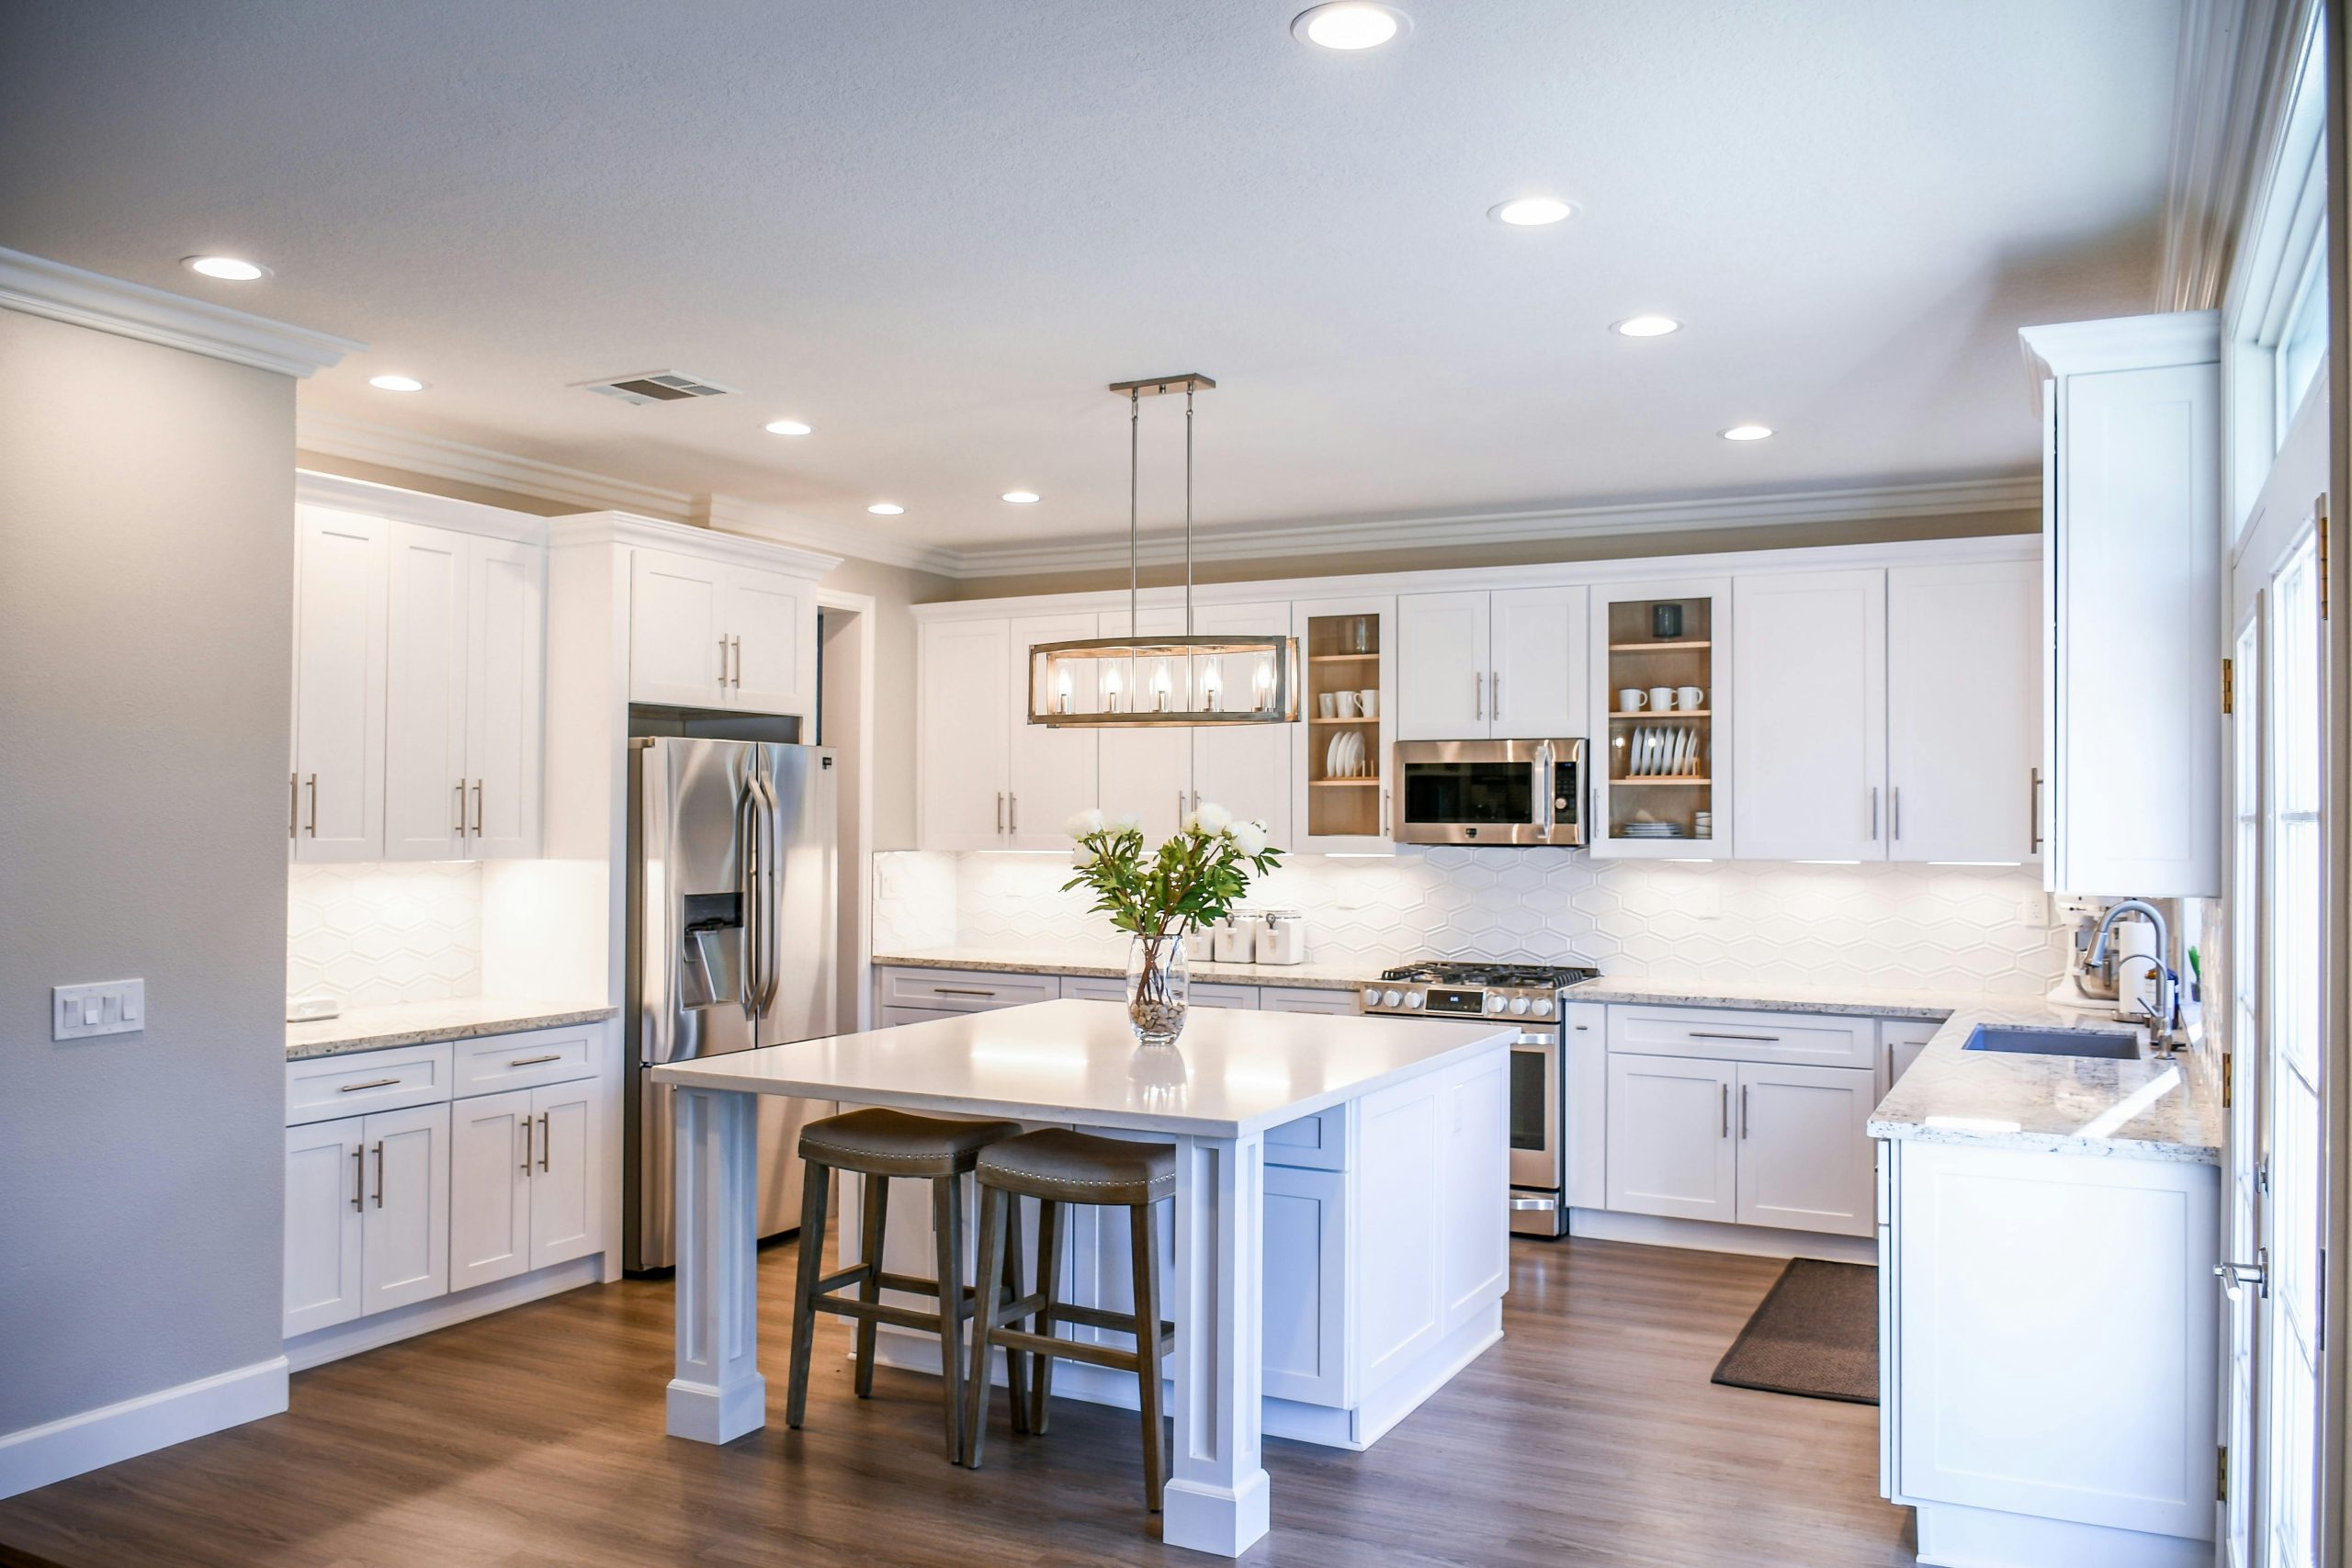
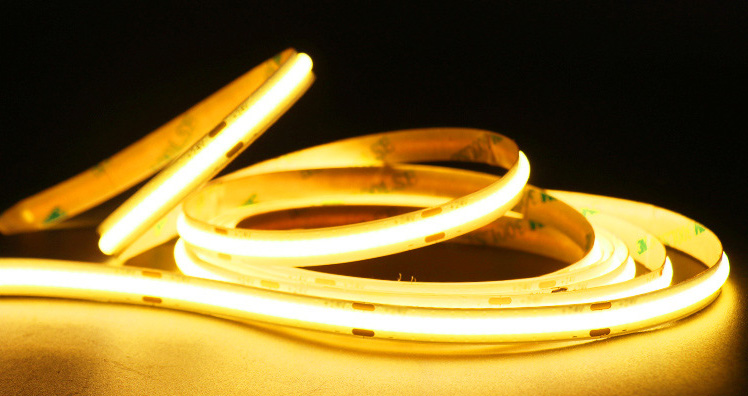
How To Hide LED Strip Under Cabinets?

Adding lighting under the cabinets effectively brightens your cabinets, especially the dark corners or edges. It helps to illuminate the countertop workspace, making it easier to see while preparing food or cooking. We recommend using Flexible LED Strips as the light source, which can provide enough brightness and long linear lighting along the edge of the Cabinets. But the question is, how do you hide the LED Strips under cabinets? Because there is a lot of oil smoke, it isn’t easy to mount them on. Working for a long time in that situation will shorten the lifespan of LED Strips. So we recommend using the aluminum channels to hide the LED strips under cabinets.

LED Light Channel Under Cabinet

What’s the benefit of LED Channels?

The LED Strips will be installed on the aluminum base and the surface with a diffuser, which not only conceals the LED Strips but also protects them from dust, rain, moisture, etc. They can also work as a heat sink for better heat dissipation, extending your LED Lights’ lifespan.

Corner Mounted LED Profiles For Under Cabinets

Where can you get them?

You can order the LED Channels for under cabinets from us below:

https://www.ledbe.com/aluminum-led-channels/cabinet-series-led-profiles

LED Channels For Under Cabinets

Products are available in various shapes, colors, and lengths. You can choose the ones that suit your preference.

How to install them?

  1. Mount LED Strips on the LED Channels and install the end caps.
  2. Mount the mounting clips under the cabinets.
  3. Mount the LED Channels on the clips and lead out the power cable of the Strip Lights.
  4. Connect the cable to a power source or light controller.

What LED Strips do you recommend?

We will recommend the high-density COB LED Strips as the light source; they can create a warm and inviting ambiance in the kitchen and enhance the overall look and feel of the space.

Modern design kitchen

Adding lighting under the cabinet can help to highlight backsplashes or other design features, adding depth and dimension to the room and improving the functionality and appearance of your kitchen.

AC Triac RF Push Dimmer

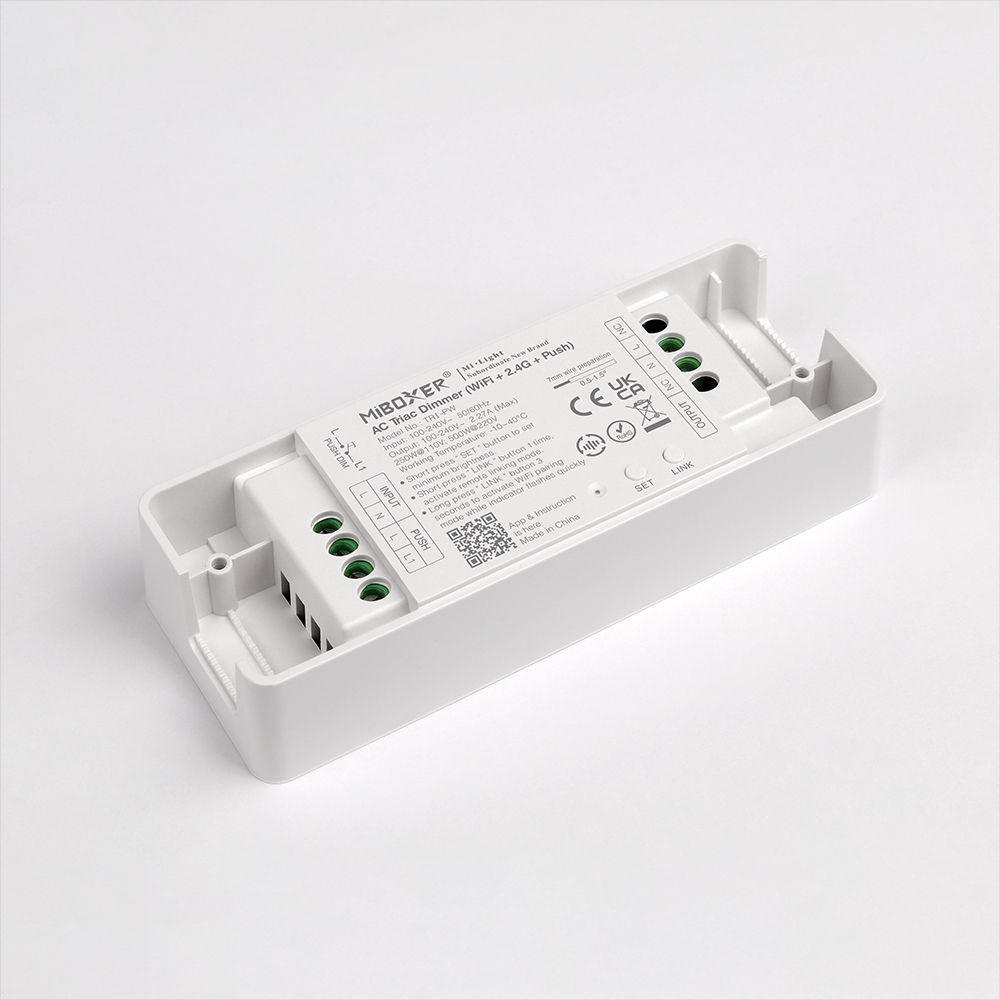
Newest 500W AC Triac Dimmers In Stock

The MiBoxer newest 500W AC Triac Dimmers are in stock, which can be used to control traditional incandescent lamps, halogen lamps, and triac dimmable LED Lamps. It supports setting up minimum brightness and adjusting the brightness for various scenes. Three versions are available: 2.4G, Zigbee 3.0 + 2.4G, and WiFi + 2.4G. Not only can it be controlled by 2.4G RF Remote Controls, but it can also be controlled by Tuya Smartphone APP and third-party voice commands. All of them support Push dimming.

Dimmer Triac LED
MiBoxer 500W AC Triac Dimmer
Dimmer LED Triac

After pairing it to a 2.4G gateway, the Tuya Smart APP and third-party voice commands can control the TRI-PR. TRI-PZ needs to pair with a Zigbee 3.0 gateway, and TRI-PW does not need a gateway. You can achieve more functions on the APP, like wireless dimming, group control, timing control, one-key execution, automation, etc. If the input voltage is AC110V, the max loading power can not exceed 250W; if the input voltage is AC220V, the power do not exceed 500Watts.

Connection Diagram:

Dimmer Triac 220V

If you want to order MiBoxer AC Triac Dimmers, please check the link below:

https://www.ledbe.com/miboxer-500w-rf-push-ac-triac-dimmer-app-control

30A WiFi LED Controllers

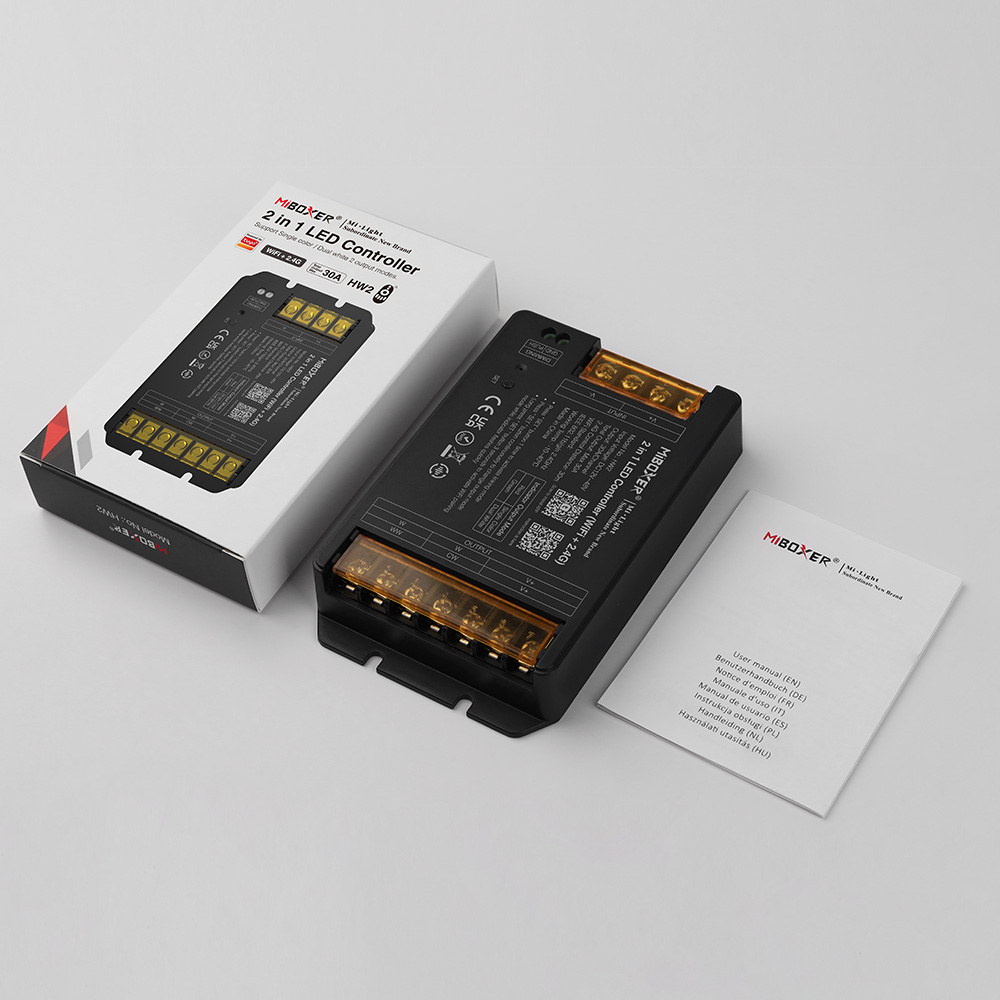
The New 30A Large Output Current Controllers Arrived

The newest MiBoxer 30A Light Controllers are available on Ledbe now. Those with a max 30A output current design can load more LED Lights than similar products.

30A WiFi LED Controllers

There are 2.4G series and 2.4G+WiFi series Controllers available. The 2.4G series includes HR2(2 in 1) and HR5(5 in 1). The 2.4G + WiFi series includes HW2(2 in 1) and HW5(5 in 1). The 2 in 1 Controllers are designed for dual-white and single-color LED Lights; 5 in 1 can be used for all types: single-color, dual-white, RGB, RGBW, and RGB+CCT.

All of them can work with MiBoxer RF Remote Controls; you can use the remote control to select the color and adjust the brightness, color temperature, and saturation for various scenes. Also can work with Tuya APP and third-party voice commands. You can control the Lighting from your phone or use the voice commands. The WiFi series can pair to your WiFi network directly, and the 2.4G series needs to add a 2.4G Gateway.

LED Controller Voice Control

Those Controllers with auto-transmitting & synchronization functions. One Controller or Dimmer receives the signal from a 2.4G RF Remote and will transmit to the same model LED Device within 30 meters; all will synchronize. This will be very helpful if you want all LED Lights to change simultaneously.

Tuya LED Controller

If you want to order some for your projects, please check the link below:

2 In 1 series: 30A 12V Dimmers For Single-color/Dual White

5 In 1 series: 30A Tuya RF Lighting Controllers

Waterproof LED Strip Lights

How To Make Your LED Strips Waterproofing?

Some customers ask us the question: How do we make the LED Strips waterproofing? It’s a good question because there are high-quantity demands for the Waterproof LED Strip Lights. You need waterproofing when you want to add LED Strips in your bathrooms, gardens, yards, and other places. Let’s teach you how to make them waterproof.

Items you need:

The steps of making your LED Strips waterproof:

  1. First, choose the appropriate width of the Silicone Channel and cut the same length with your LED Strips.
  2. Waterproof Outdoor LED Strips
  3. There is a rope in the silicone channel; you can tie it to the wires on one side of the Strip Lights and insert it into the silicone channel.
  4. waterproof led strip lights
  5. outdoor led strip lights
  6. Pull the other side of the rope out of the silicone tube and fully let the LED Strips into the tube.
  7. led strip lights outdoor waterproof
  8. Install the silicone end caps with wire holes and without wire holes on both ends of the Silicone Channels, and seal them with silicone glue.
  9. bathroom led strip
  10. led strip outdoor waterproof
  11. Installation finish.

Now you know how to make your LED Strips waterproof. You can add them to your home or outdoor location where you need waterproof resistance.

The Correct Way To Hang LED Strips On Walls

LED strips are a popular way to add ambient lighting to any room. Whether you want to create a relaxing atmosphere or enhance the aesthetics of your space, hanging LED strips on walls can be a great solution. But how to hang LED Strip Lights without damaging the wall? Today, let’s teach you to do it correctly.

Firstly, make sure you have all the necessary tools and materials. You will need LED light strips, a power supply, adhesive tape or clips, a ruler or measuring tape, and scissors.

Before you start hanging the LED strips, it’s important to plan where you want them to go. Consider the layout of your room and the areas you want to highlight. You can place them along the edges of the ceiling, around mirrors or artwork, or even behind furniture for a subtle glow.

Once you have decided on the placement, measure the wall length where you want to hang the LED strips. This will help you determine how much strip lighting you will need. Cut the LED strips to the appropriate length using scissors, following the marked cutting lines on the strips.

Next, clean the wall surface where you will attach the LED strips. This will ensure that the adhesive tape or clips stick properly. Use a mild cleaner and a cloth to remove any dust or dirt.

Now it’s time to attach the LED strips to the wall. If you use adhesive tape, peel off the backing and stick the strips along the desired path. Make sure to press firmly to ensure a secure bond. If you use clips, attach them to the wall first and then slide the LED strips into place.

Once the LED strips are installed, connect them to the power supply. Follow the manufacturer’s instructions for wiring and connecting the strips. Make sure to test the lights before finishing the installation.

You can use cable management solutions such as cord covers or raceways to hide any visible wires. These will help keep the wires neat and out of sight.

Lastly, step back and admire your newly installed LED strips. Please turn on the lights and enjoy the ambiance they create. Remember to periodically check the strips for any signs of damage or wear and tear.

Hanging LED strips on walls can transform the look and feel of any room. You can achieve a beautiful and seamless installation with the right tools and patience. So go ahead and get creative with your lighting design!

Great For DIY-Super Narrow Addressable LED Strips Available

The super narrow Addressable LED Strips are available on ledbe.com. The width is only 2.7mm, and they are flexible and bendable. You can install them in tight spaces for DIY projects on toys, models, dresses, cars, etc.

160 pieces of LEDs are mounted on each meter of the PCB board, and WS2812B ICs are used for individually addressable. There are 5V and 12V products available. The minimum cutting length is 12.5mm; you can cut to your desired size and reconnect them for your projects. One side has a JSM SM 3P connector for easy connection to the Pixel Controller to achieve hundreds of lighting effects. The other side comes with black and red wires for adding voltage. The back has double-sided adhesive tape, so removing the protector paper and sticking it to the place you want to install it is easy.

Features:

  • Model: 2.7-SMD-RGBIC
  • Type: Individually Addressable Digital LED Strips
  • IC Type: WS2812B
  • Working Voltage: DC5V/DC12V
  • LED Quantity: 160LEDs/Meter
  • IC Quantity: 160PCS/Meter
  • Wattage: 6W/M(DC5V), 12W/M(DC12V)
  • Colors: RGB Full Color
  • IP Rating: IP30 Non-waterproof
  • Length: 5 Meters/Roll
  • View Angle: 180°
  • Pins:  V+(Red Wire), DATA(Green Wire), GND(White Wire)
  • Minimum Cutting Length: 12.5mm(Every 2 LEDs)
  • Both Ends With 3P Light Connectors
  • Back With Double-Sided Adhesive Tape
  • Working Temperature: -20℃-+45℃
  • Storage Temperature: -20℃-+60℃
  • Lifespan: >35,000 Hours
  • 2 Years Warranty

Where can you order the 2.7mm WS2812B LED Strips?

Link: https://www.ledbe.com/2.7mm-individually-addressable-2812-led-strip