If you do not have experience in interior decoration, adding LED strips to your ceiling or wall will be a big challenge. But it will be very easy if you know how to do it. So today, let us teach you how to do it.
What are the benefits of mounting strip lights on ceilings/walls?
- Protect the LED lights: The most common methods for mounting flexible LED strips on ceilings are double-sided adhesive tape or silicone clips. However, the exposed strip lights will be affected by surrounding conditions, such as accidental bumps, spills, and rain, which may shorten their lifespan. So, if we could put them in something and keep them safe, it would extend their lifespan.
- Consistent With Your Designs: Adding a light strip alone will look out of tune with the overall design, especially when the light strip’s surface features different colors and the light dots on the SMD light strip. Hiding the light strip with a slot that matches your interior will make the overall design look more beautiful.
- Aesthetics: For a sophisticated look, hide strip lights on ceilings, walls, under cabinets, along baseboards, under shelves, etc. You can transform the space elegantly while keeping the interior design clear and gorgeous.
- Anti-glare: High-density LED strip lights cause glare, making people’s eyes uncomfortable and even causing headaches. This can be fixed simply by adding a diffused cover to the LED strips.
The Ways To Hide Them:
Using aluminum LED channels will make it easy to hide LED strips on ceilings or walls. There are four ways to install the LED channels on the ceilings or walls:
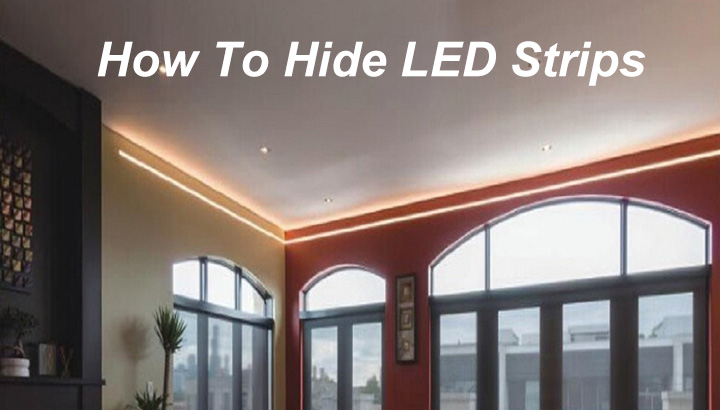
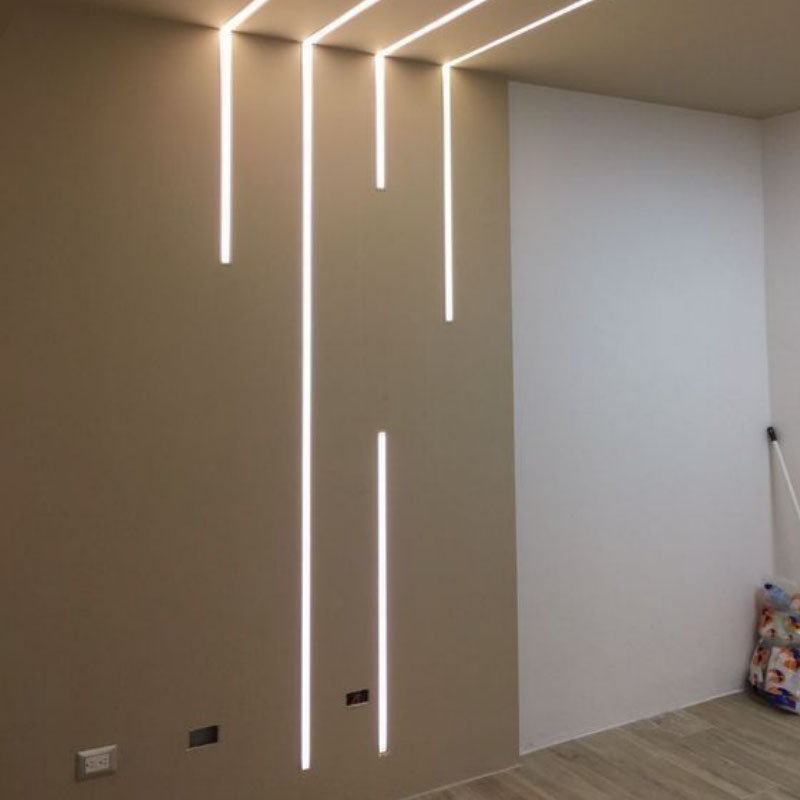
- Suspended: The suspended installation method allows you to mount LED strips on ceilings to create a sleek, modern look and enhance the overall design of your space. It can also add visual interest and depth to ceilings. There are lighting slots in the aluminum LED channels; you can insert the LED strips and clip the diffusers in to diffuse the light evenly, reducing harsh shadows and hotspots. This installation method can take various configurations, such as straight lines, squares, or geometric patterns, enabling creative, customized lighting solutions.
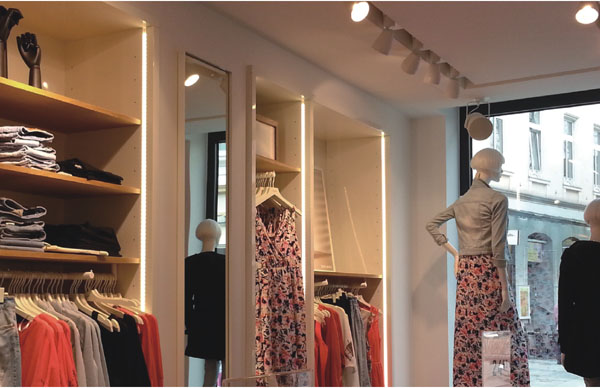
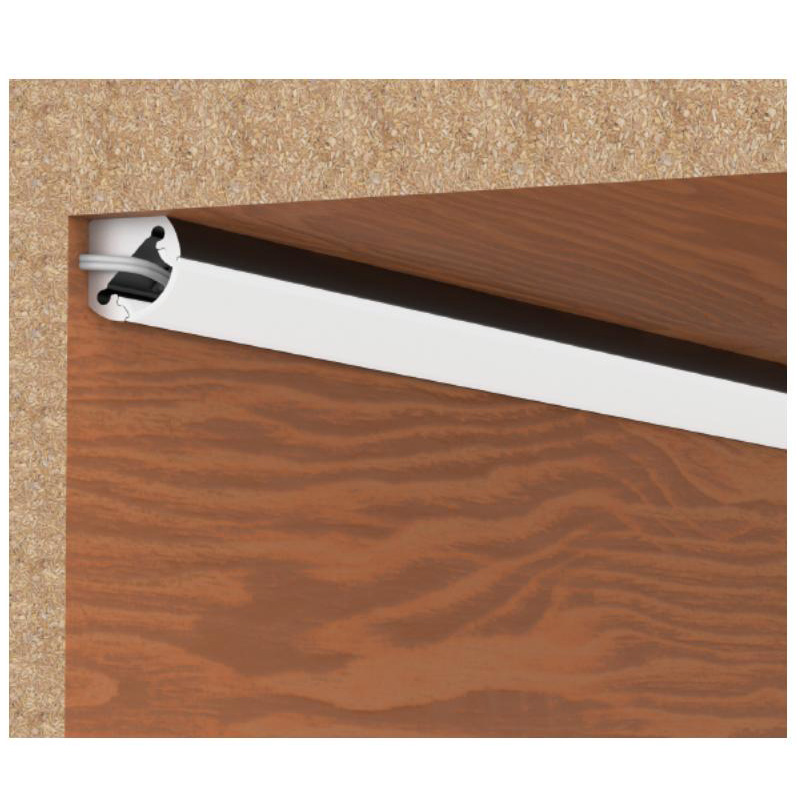
- Surface Mounted: This installation method is typically straightforward, often requiring only adhesive or screws. This makes them suitable for both DIY projects and professional installations. You can choose from various LED light channel shapes and sizes, and they can be customized to suit different design aesthetics and applications for residential and business settings. The flexible LED strips can be easily stuck inside; the diffusers will diffuse the lighting smoothly without dark areas. They can provide direct lighting for task lighting. The aluminum channels will protect the strip lights from dust, moisture, and physical damage, thereby extending their lifespan. The mounting clips are included; you can mount them on walls or ceilings.
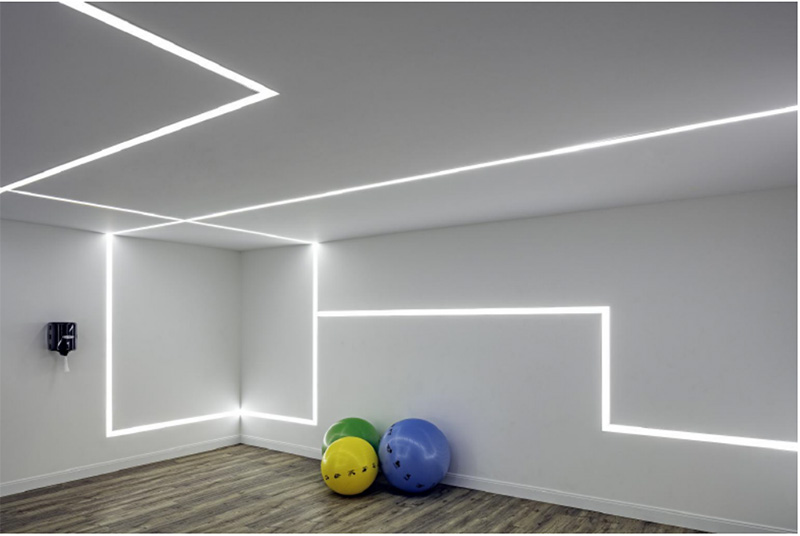
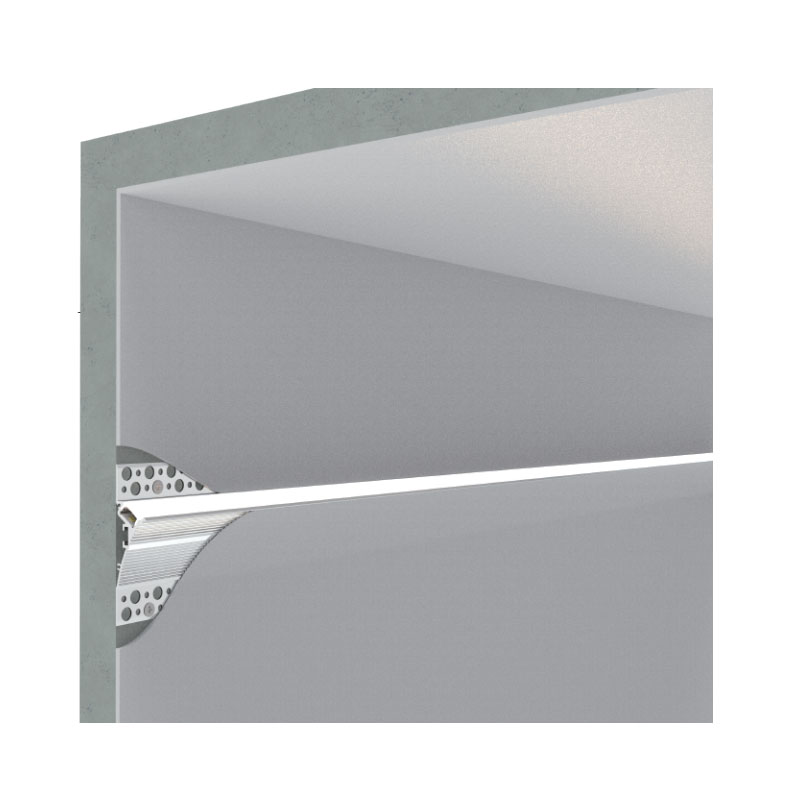
- Recessed: The recessed installation method allows them to integrate seamlessly with the surroundings. When flush with the ceiling or wall, they create a clean, unobtrusive look, enhancing the overall design of your space without visible fixtures. Those light channels will provide uniform lighting, reducing harsh shadows and ensuring a balanced ambiance. The recessed designs will minimize direct glare, making them suitable for areas where comfort and visibility are essential, especially in residential spaces.
- Mud-in: The mud-in installation is another recessed method, particularly popular in architectural designs. It is designed to be embedded into the wall or ceiling, providing a flush, clean appearance that blends seamlessly with the surrounding surfaces, making it ideal for minimalist and contemporary interiors. The mud-in LED channels can be used for various purposes, including indirect lighting, accent lighting, and general illumination, allowing creative design possibilities.
How to hide LED strips using aluminum channels:
- Choose the correct LED channels: Confirm the installation method for your LED strips and choose the proper aluminum LED strip channels.
- Measure and cut: Measure the area where you plan to install the LED strips, then cut the channel to the desired length using a saw or cutter.
- Install LED channels: mount the aluminum LED channels on ceilings or walls.
- Peel off the backing from the LED strips and stick them inside the channel, ensuring they’re correctly aligned.
- Clip in the diffusers: snap or slide the diffused cover onto the channel to diffuse the light and hide the strip lights.
- Connect the LED strips to the power supply and check that the lighting is working.
- Check if everything is working correctly.
- Installation completely.
Conclusion:
The easiest and fastest way to hide LED strips on walls or ceilings is to use aluminum LED channels. They look sleek and modern, provide even light output, and offer anti-glare. They are great for DIY lighting projects and interior lighting design in your space.